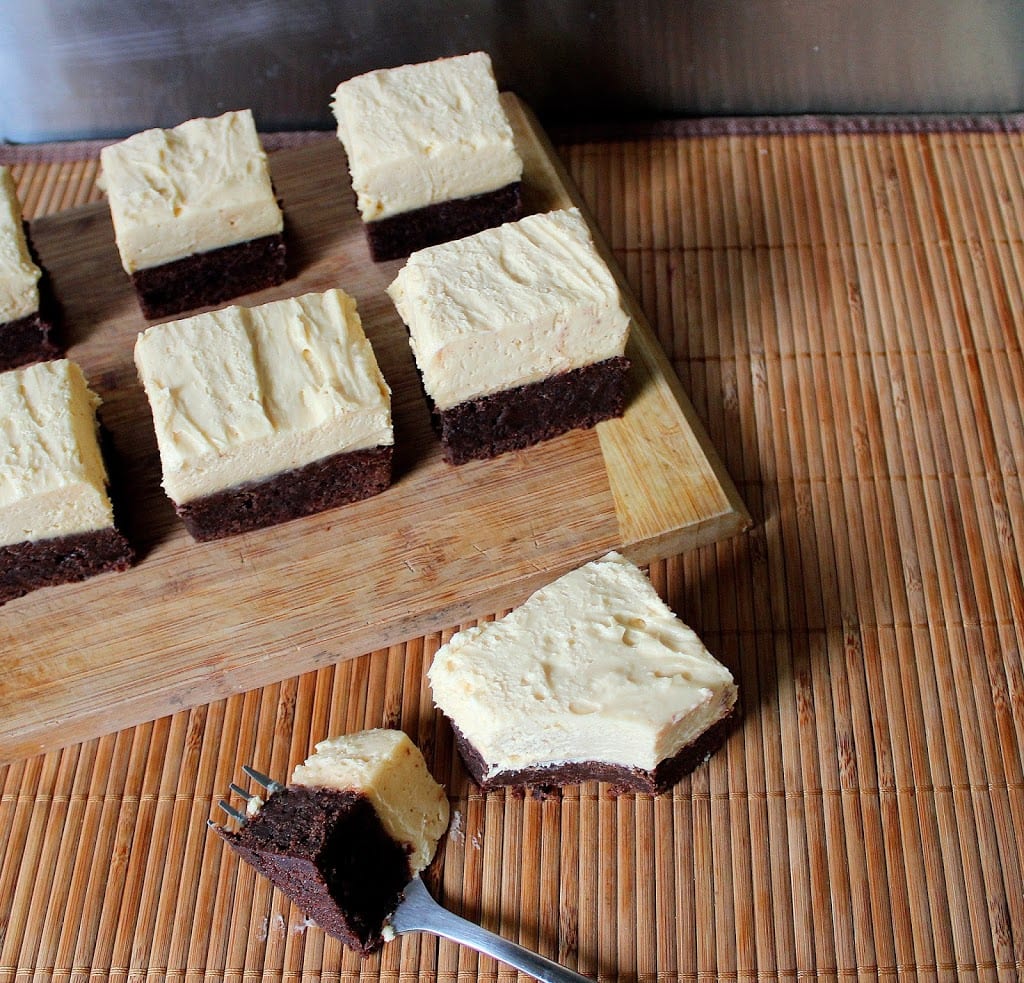
Peanut Butter Cheesecake Brownies
My sweet friend Nicole was one of my very first blogger friends! We started our blogs around the same time and it has been so much fun to grow together! Her blog is wonderful and her specialty is DESSERTS, especially cheesecakes! Oh and in her spare time she is also studying towards her PhD in Biochemistry/Neuroscience. Not too shabby huh? I was SO thrilled when she offered to do a guest post for my blog! And OH MY GOODNESS is this a great recipe! Here is Nicole from PicNic!
~~~
Aunt Bee’s Recipes is my absolute favorite food blog so I am delighted to have created this recipe just for Aunt Bee and her readers. I knew straight away that I wanted to create a dessert recipe. Something both decadent but simple to make, something cooks at any level could whip up with ease. I think this Peanut Butter Cheesecake Brownie ticks all the right boxes.
The brownie has a fantastic thick, fudgy texture. It would be great on it’s own too, especially with some chocolate chips or nuts added!
Peanut Butter Cheesecake Brownies
Makes 20 pieces
Brownie:
200 g (7 oz) butter
200 g (7 oz) quality dark chocolate
1 Cup sugar
1/2 Cup brown sugar
1/2 Cup plain flour
3 Tbsp cocoa powder
4 eggs, lightly beaten
2 tsp vanilla extract
Cheesecake:
500 g (18 oz) cream cheese
1/3 Cup sugar (caster/superfine would be best)
1 Cup smooth peanut butter
1 Cup cream, whipped
1. Preheat oven to 180C (350F) and line the base of a slice pan with baking paper. Make sure there is some paper overhanging the sides to make it easy to lift out of the tin at the end.
2. Make the brownie by melting the chocolate together with the butter before whisking in the sugar and eggs. Sift in the flour and cocoa and stir well to combine. Pour into the prepared tin and bake for 30 minutes. Remove from the oven and set aside to cool (leave it in the pan).
3. Make the cheesecake by beating together the cream cheese, sugar, and peanut butter until light and lump free. Fold in the whipped cream and spread the mixture over the cooled brownie.
4. Cover and refrigerate until set. Once set, lift out of the tin and cut into small squares and enjoy!
~~~
Amazing right? You can follow Nicole here:
Facebook: https://www.facebook.com/picnicnz
Pinterest: http://www.pinterest.com/picnicnz/
Twitter: https://twitter.com/PicNic_NZ


3 Comments
Leave your reply.